The following sequence shows the stages in turning a wooden bowl, starting with a slice of a freshly felled oak tree. At this stage the wood is very wet, which makes it a little softer, and therefore easier to work, than it will be when its had time to dry out. The downside is it can distort quite substantially, and sometimes split, as it dries. This gives the turner two choices: either finish it whilst its still wet and accept it will change its shape a little, or alternately do a rough shaping initially, and finish it off later when it has finished moving. This is called “twice turning”. The drying process, called seasoning, is a slow process, the rule of thumb being about a year per inch of thickness.
This piece of oak in this example was cut from an 8 inch thick slab cut from the trunk of a large oak tree.

It’s somewhat wider than its thickness, so the first step is to cut it into a roughly circular shape and then mount it in the lathe using a screw-chuck. In this case I simply squared it off and removed the corners so it was octagonal, though a neater way is to cut it into a circle using a bandsaw.
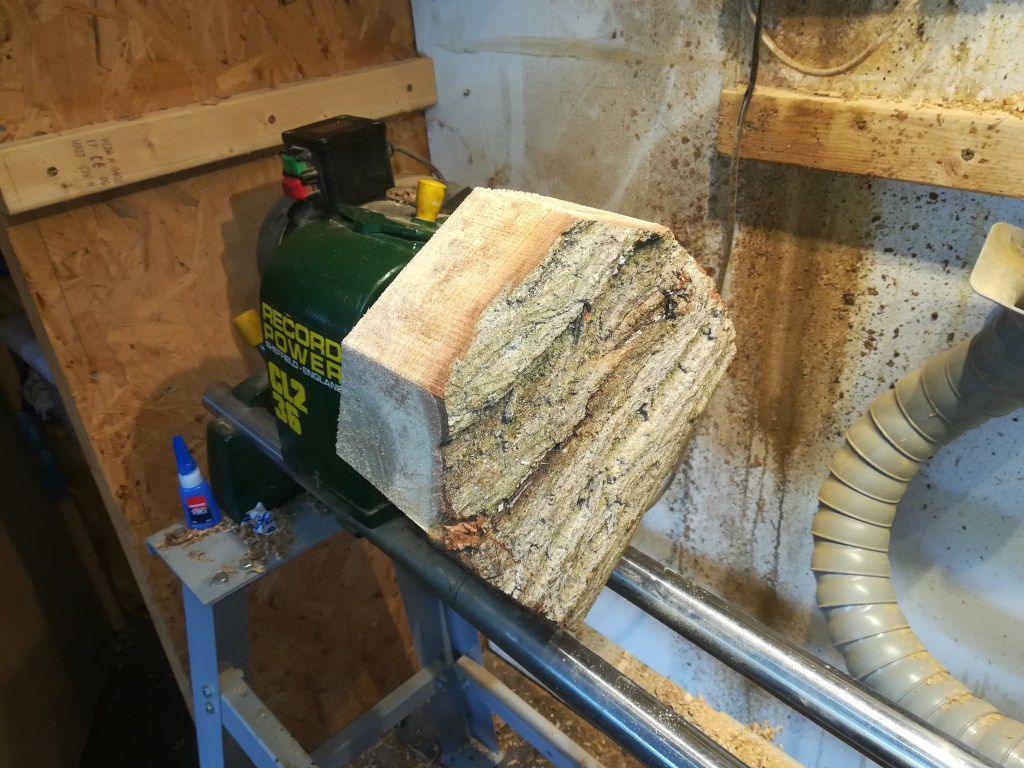
Its very unbalanced at this stage, so starting at a low speed (450rpm) I use a gouge to start the initial shaping. As it becomes rounder the balance improves and I can move up to my standard speed of 1000rpm.
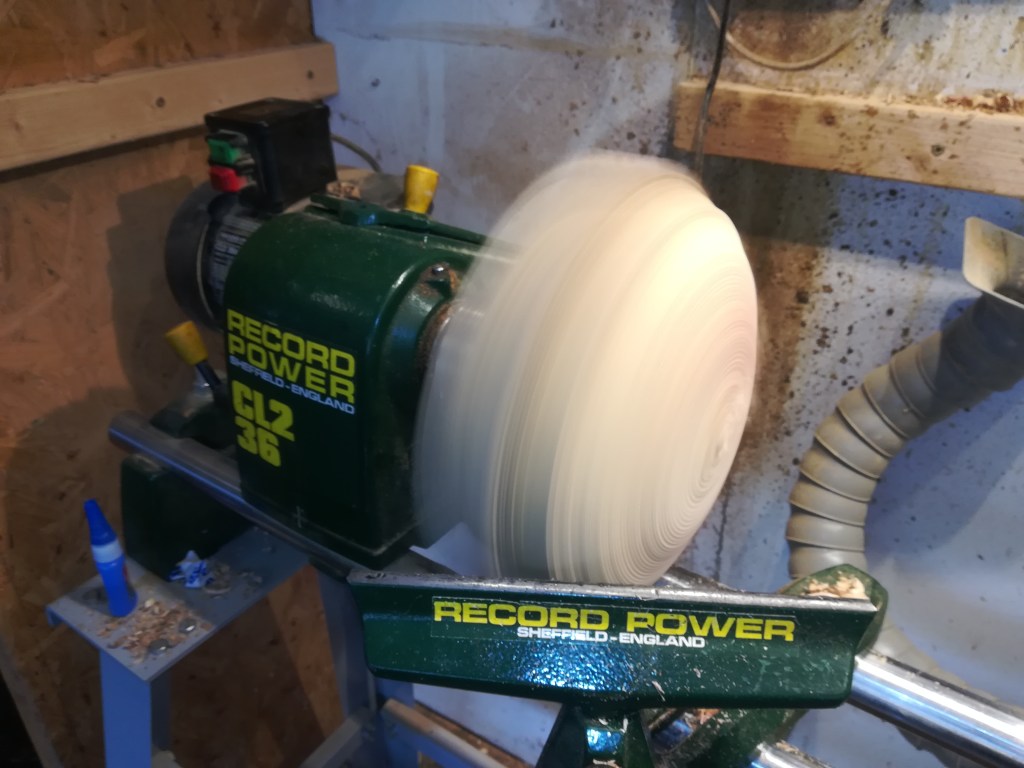
Continuing the process eventually yields a completely round form, and a foot is formed so the piece can be reversed and gripped by the chuck for turning the inside. The actual bowl profile can be made into any curve desired, but I usually just let the shape of the log dictate the overall form, and aim for a smooth curve. This approach also ensures the maximum size bowl from the log.

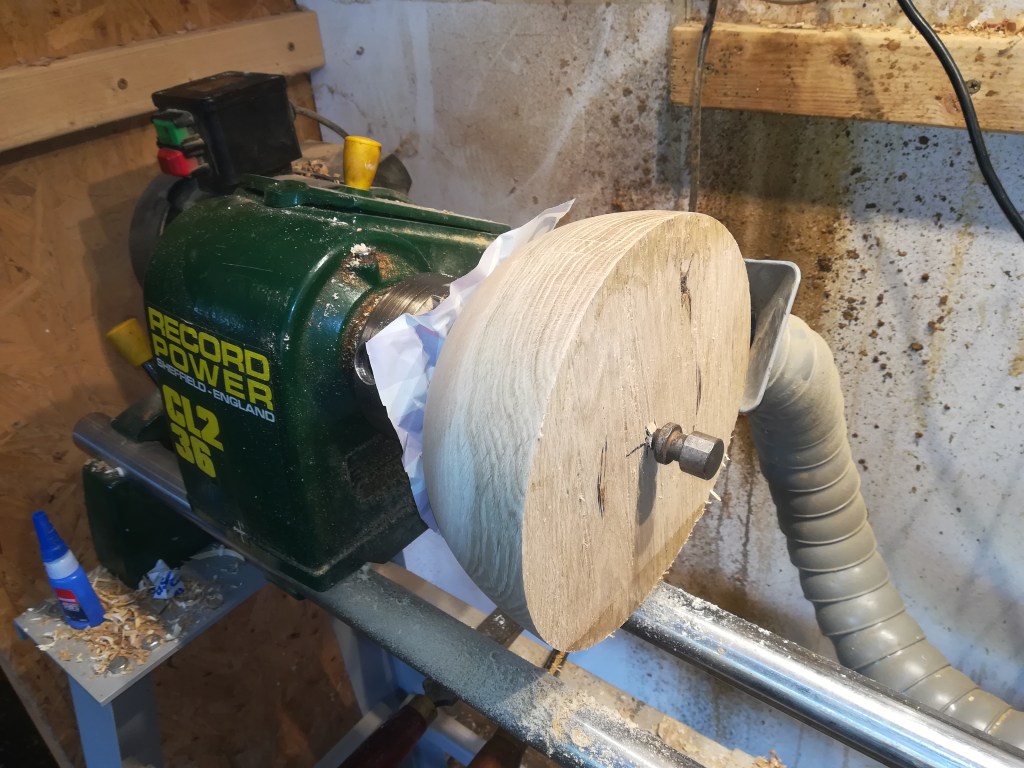
After this shaping, and some sanding to give a smooth surface, the bowl can be reversed in the chuck.
One of the problems with working with green oak is the acid in the sap can react with iron or steel to create a blue stain. Thus a small piece of plastic sheet is used to insulate the bowl foot from the chuck jaws. The screw-chuck fitting can still be seen in the centre of the wood.
The second stage in making the bowl is to hollow the inside using a gouge. I start by squaring off the surface, then progressively remove wood as shown in the picture. Gradually the whole of the inside is converted into a large pile of shavings. These are mostly quite fine and so can be composted, converted into briquettes, used in the garden as a mulch or to make paths around vegetable beds. The alternative to this is to extract the middle using a ‘coring’ device. This lets a smaller bowl be made from the inside, but specialist tools and a more powerful lathe are necessary. Next year perhaps….

The wall can be made any thickness desired – thicker walls feel chunky and more substantial, thinner ones are possibly a bit more elegant. This one is about ‘medium’. Either way, it’s good to aim for an even thickness, otherwise difference parts of the wall will dry at different rates which can lead to splitting. In some cases I leave the base a bit thicker so the extra weight increases the bowl’s stability.

So eventually we achieve the required shape inside and out. The surfaces can still be a little rough at this stage, so abrasives are used to obtain a smooth surface. This is done using small sanding discs mounted in a hand drill and applied while the lathe is spinning. For these green wood bowls I use 120 grit followed by 240 grit. Clogging can be a problem, and frequent clearing is usually necessary. It is possible to use much finer grit, but since the surface tends to roughen as the wood dries, this is not usually worth the effort. On dry wood it’s possible to aim for a mirror finish using grits as fine as 600grit.
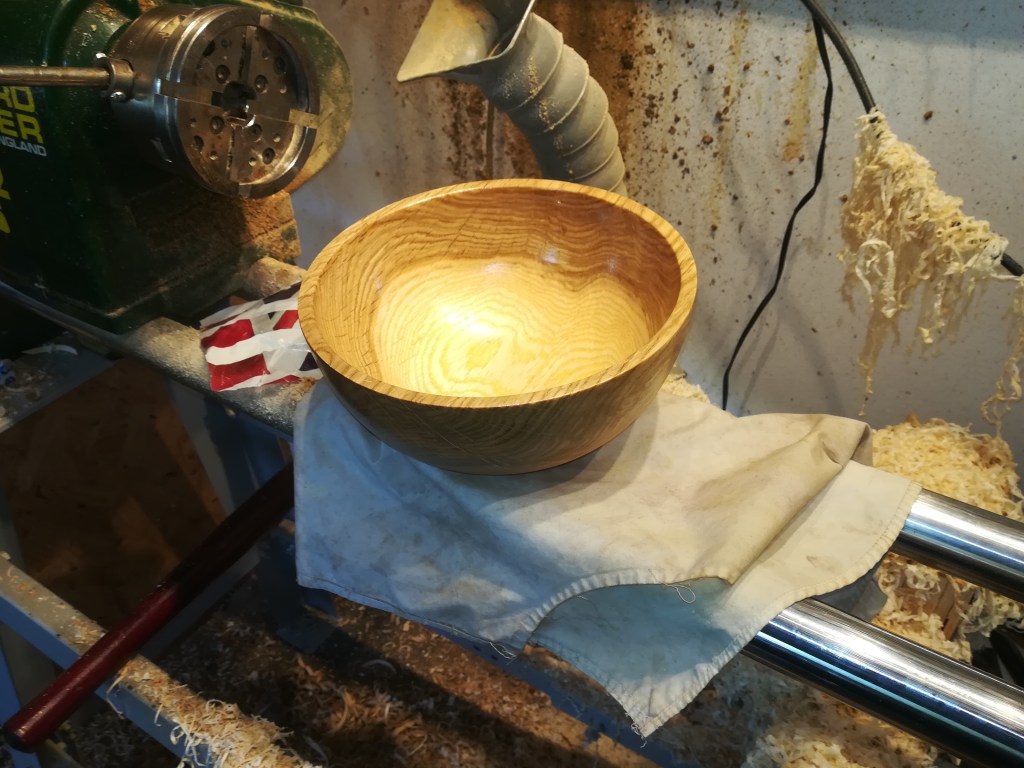
Eventually we’re all finished…. ta da!
There is a wide choice of finishes available. Penetrating oils such as tung oil, lemon oil or linseed oil can give a very pleasant and deep finish, even on green wood. I like them a lot. Danish oil is also a good option since it contains hardening agents and small amounts of varnish, and is thus a bit more durable. Whichever oil is used, several coats are usually necessary to develop a good finish.
Wax can also be used, either on it’s own or as a final layer over an oil to increase the shine. This bowl has been finished with linseed oil, which I think works particularly well with oak. More recently I’ve purchased some buffing wheels which can create a nice shine if desired.
